Navigating the escrow account process can be confusing, especially for first-time homebuyers. But don’t worry, we’ve got you covered!
Here’s a quick snapshot to get you started:
- Definition: Escrow is a financial arrangement where a neutral third party holds funds or assets until specific conditions are met.
- Purpose: It ensures both parties in a real estate transaction fulfill their obligations before completing the deal.
- Steps: Includes opening an escrow account, inspections, obtaining insurance, final walkthrough, and closing.
In real estate, escrow acts as a safeguard, holding money in a secure account managed by an unbiased third party—usually an escrow company or attorney. This ensures that all conditions of the sale are met before any funds or property change hands.
Whether you’re dealing with earnest money, property taxes, or unresolved contract items, understanding the escrow process can help ensure a smooth and secure transaction.
What is an Escrow Account?
An escrow account is like a safety deposit box for your money during a real estate transaction. It’s managed by a neutral third party, such as an escrow company or attorney, to make sure that all conditions of the sale are met before any funds or property change hands.
Types of Escrow Accounts
There are two main types of escrow accounts in real estate:
- Home Purchase Escrow Accounts
- Escrow Accounts for Taxes and Insurance
Home Purchase Escrow Accounts
When you buy a home, you usually have to make an initial deposit called earnest money. This shows the seller that you’re serious about the purchase. This money is held in an escrow account until the sale is finalized.
- Earnest Money: If the deal goes through, the earnest money is applied to your down payment. If the deal falls through due to the buyer’s fault, the seller usually keeps the money.
- Escrow Holdback: Sometimes, funds are held back even after the sale is completed. For instance, if the seller needs to make repairs or if there are outstanding bills.

Escrow Accounts for Taxes and Insurance
After you buy a home, your mortgage lender will set up a different type of escrow account to handle your property taxes and homeowners insurance. Each month, part of your mortgage payment goes into this account.
- Property Taxes: Your lender uses the money in this account to pay your property taxes when they are due.
- Homeowners Insurance: The account also covers your homeowners insurance premiums.
- Mortgage Insurance: If you have an FHA loan or made a down payment of less than 20%, your escrow account will also cover mortgage insurance premiums.
Why Use an Escrow Account?
Using an escrow account makes managing homeownership costs easier and more predictable:
- Monthly Payments: Instead of paying large tax and insurance bills once a year, you spread the cost over 12 months.
- Automatic Payments: Your lender pays the bills on your behalf, so you don’t have to worry about missing a payment.
- Cushion for Changes: Lenders often require a cushion (usually two months’ worth of payments) to cover unexpected increases in tax or insurance costs.

Annual Escrow Analysis
Each year, your lender will review your escrow account to make sure you’re paying the right amount. If there’s too much money in the account, you’ll get a refund. If there’s not enough, you’ll need to pay the difference.
- Overage: You get a refund.
- Shortage: You can either pay the shortage in a lump sum or spread it out over the next year’s payments.
Understanding the escrow account process can make home buying and ownership much smoother. Whether it’s for holding your earnest money or paying your taxes and insurance, escrow accounts provide a layer of security and convenience.
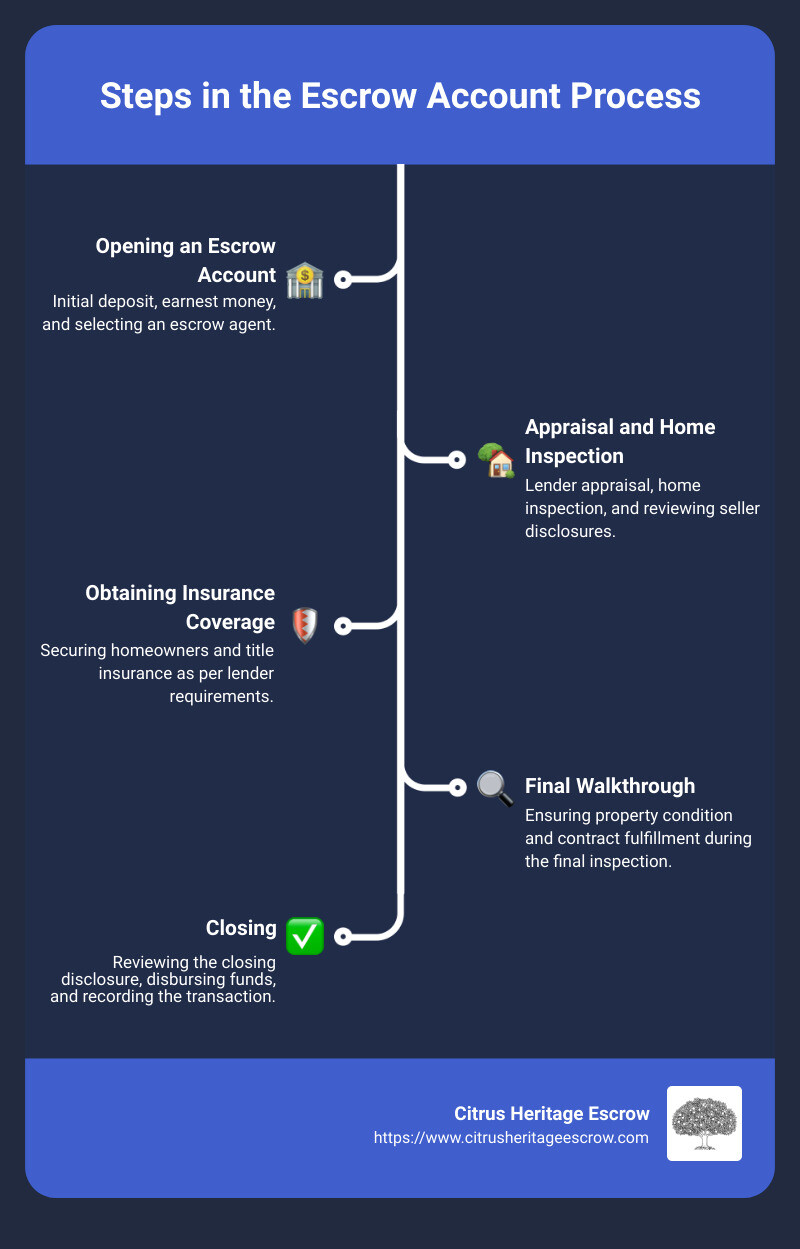
Steps in the Escrow Account Process
Navigating the escrow account process can seem daunting, but breaking it down into manageable steps makes it much easier. Here’s what you need to know:
1. Opening an Escrow Account
Once the seller accepts your offer and you both sign a purchase agreement, the first step is to open an escrow account. Your real estate agent typically handles this by depositing your earnest money into the account.
- Earnest Money: This good faith deposit shows the seller you’re serious. It’s held in the escrow account until closing.
- Neutral Third Party: The escrow agent, often a title company or attorney, manages the account to ensure all conditions are met.
2. Appraisal and Home Inspection
Next, the lender will conduct an appraisal to determine the home’s value. This is crucial for securing your mortgage.
- Lender’s Appraisal: Protects the lender’s interest by ensuring the home is worth the loan amount.
- Home Inspection: You’ll also need a home inspection to check for structural issues or necessary repairs. If problems are found, you can negotiate with the seller to fix them.
3. Obtaining Insurance Coverage
Before closing, you must secure homeowners insurance and, often, title insurance.
- Homeowners Insurance: Protects against damage to the property.
- Title Insurance: Ensures there are no legal claims against the property.
4. Final Walkthrough
A few days before closing, you’ll do a final walkthrough of the property.
- Property Condition: Ensure the home is in the agreed-upon condition.
- Contract Fulfillment: Verify that all negotiated repairs are complete.
5. Closing
The final step is closing, where all documents are signed, and funds are disbursed.
- Closing Disclosure: Review this document, which outlines your loan terms and closing costs.
- Funds Disbursement: The escrow agent will release funds to the seller, and you’ll receive the keys to your new home.
Understanding these steps helps make the escrow account process smoother and less stressful. Now, let’s explore how escrow accounts continue to play a role for homeowners after the purchase.
1. Opening an Escrow Account
Once the seller accepts your offer and you both sign a purchase agreement, the first step is to open an escrow account. Your real estate agent typically handles this by depositing your earnest money into the account.
Initial Deposit
The initial deposit, often referred to as earnest money, is a good faith gesture from the buyer to the seller. This deposit shows that you’re serious about purchasing the home. It’s usually 1-2% of the home’s purchase price and is held in the escrow account until closing.
Example: If you’re buying a home for $300,000, your earnest money deposit would typically be between $3,000 and $6,000.
Role of the Escrow Agent
The escrow agent plays a crucial role in the escrow account process. They are a neutral third party responsible for managing the escrow account. This ensures that all conditions of the purchase agreement are met before any funds are released. The escrow agent can be:
- A title company specializing in real estate transactions.
- A real estate attorney who handles the legal aspects of the transaction.
- A bank or financial institution offering escrow services.
Title Company
A title company is often used as the escrow agent. They handle several tasks, including:
- Conducting a title search to ensure the property title is clear of any liens or legal disputes.
- Issuing title insurance to protect both the buyer and lender from any future claims against the property.
Quick Fact: According to the California Land Title Association, the escrow agent ensures all conditions of the sale are met before releasing the funds.
Real Estate Attorney
In some states, a real estate attorney is required to handle the closing process. Even if not required, hiring an attorney can provide peace of mind by ensuring all legal aspects are covered.
- Legal Expertise: Attorneys specialize in real estate transactions and can help you understand complex legal jargon.
- Contract Review: They ensure that all terms of the purchase agreement are fair and legally binding.
Quote: “Most responsible real estate agents advise against waiving an inspection,” says Katie Severance, a Realtor with Douglas Elliman in Palm Beach, Fla.
2. Appraisal and Home Inspection
After opening an escrow account, the next step is the appraisal and home inspection. These steps ensure the property’s value and condition meet your expectations and your lender’s requirements.
Lender Appraisal
Your mortgage lender will require an appraisal to determine the home’s market value. This is crucial because the lender needs to ensure the property is worth the loan amount.
- Appraisal Process: A licensed appraiser visits the property to assess its value based on factors like location, condition, and comparable sales in the area.
- Potential Issues: If the appraised value is lower than the purchase price, the lender may not approve the full loan amount. You might need to negotiate with the seller to lower the price or cover the difference yourself.
Example: If you agree to buy a home for $300,000 but the appraisal comes in at $280,000, you’ll need to address the $20,000 gap.
Home Inspection
While the appraisal focuses on the property’s value, a home inspection evaluates its condition. This step is optional but highly recommended.
- Inspection Scope: A professional inspector examines the home’s structural integrity, electrical and plumbing systems, heating and cooling systems, and more.
- Inspection Report: You’ll receive a detailed report highlighting any issues, from minor repairs to major defects.
Quote: “Most responsible real estate agents advise against waiving an inspection,” says Katie Severance, a Realtor with Douglas Elliman in Palm Beach, Fla.
Structural Integrity
The home inspection helps you understand the structural integrity of the property. Inspectors check:
- Foundation: Any cracks or signs of settling.
- Roof: Condition and remaining lifespan.
- Walls and Floors: Any signs of damage or wear.
Quick Fact: According to the American Society of Home Inspectors, a thorough inspection can save you from unexpected repair costs.
Seller Disclosures
Sellers are required to disclose any known issues with the property. This can include:
- Past Repairs: Information about any significant repairs or renovations.
- Hazards: Presence of lead paint, asbestos, or other environmental hazards.
- Legal Issues: Any zoning violations or disputes.
Case Study: In one instance, a buyer finded through the seller’s disclosure that the garage had been converted into a living space without proper permits. This allowed the buyer to negotiate repairs before closing.
Understanding the appraisal and home inspection phase is vital for making an informed decision about your purchase. These steps protect both you and your lender, ensuring the home is a sound investment.
3. Obtaining Insurance Coverage
Once the appraisal and home inspection are complete, the next step in the escrow account process is obtaining the necessary insurance coverage. This includes homeowners insurance and title insurance, both of which are typically required by your lender.
Homeowners Insurance
Homeowners insurance is crucial for protecting your investment. It covers damage to your home and personal property from various risks such as fire, theft, and natural disasters.
- Lender Requirement: Your lender will require you to have homeowners insurance before finalizing the loan. This ensures that the property is protected against potential losses.
- Coverage: Standard policies usually cover the structure of your home, personal belongings, liability protection, and additional living expenses if you’re temporarily unable to live in your home due to a covered event.
- Choosing a Provider: You have the freedom to choose your own insurance company. Shopping around can help you find the best rate and coverage options. According to Investopedia, it’s wise to compare quotes from multiple insurers.
Tip: Make sure to specify every hazard in your insurance policy, especially if your area is prone to specific risks like floods or earthquakes.
Title Insurance
Title insurance protects both you and your lender from any legal challenges related to the property’s ownership.
- Title Report: Before issuing title insurance, a title company will perform a title search to ensure the property is free of liens, claims, or other encumbrances. This report confirms that the seller has the legal right to transfer ownership.
- Lender’s Policy: Lenders require a title insurance policy to protect their interest in the property. This policy covers the loan amount.
- Owner’s Policy: While optional, it’s highly recommended to get an owner’s title insurance policy. This protects your equity in the property and covers legal fees if any ownership disputes arise.
Example: If a previous owner’s unpaid property taxes surface after you’ve bought the home, title insurance can cover the costs and legal fees to resolve the issue.
Lender Requirements
Lenders have specific requirements for both homeowners and title insurance to protect their investment.
- Proof of Insurance: You must provide proof of homeowners insurance before closing. The policy must meet the lender’s coverage standards.
- Premium Payments: If you have an escrow account, your insurance premiums will be included in your monthly mortgage payment. The escrow account will hold these funds and pay the insurance premiums when they are due.
Fact: According to Citrus Heritage Escrow, homeowners insurance premiums are often paid from a lender’s escrow account, ensuring continuous coverage.
Obtaining the right insurance coverage is a critical step in the homebuying process. It not only fulfills lender requirements but also provides peace of mind knowing your investment is protected.
4. Final Walkthrough
The final walkthrough is a crucial step in the escrow account process. It ensures that the property is in the agreed-upon condition and that all terms of the contract have been met. Let’s break down the key aspects of this step: property condition, contract fulfillment, and final inspection.
Property Condition
The main purpose of the final walkthrough is to verify that the property’s condition hasn’t changed since your last visit. This means checking for any new damage or issues that may have arisen.
- Checklist: Walk through each room and check the condition of floors, walls, ceilings, and fixtures. Don’t forget to inspect the exterior, including the roof, yard, and any outbuildings.
- Test Utilities: Ensure that all utilities are functioning correctly. Turn on lights, run faucets, flush toilets, and test appliances. It is wise to check water pressure and look for plumbing issues by running all water sources.
Contract Fulfillment
During the walkthrough, you’ll also need to confirm that the seller has fulfilled all terms of the purchase contract. This includes leaving behind any items specified in the agreement, such as appliances or fixtures.
- Agreed-Upon Repairs: Verify that any repairs the seller agreed to make have been completed to your satisfaction. Bring a copy of the inspection report and the repair agreement to cross-check.
- Included Items: Ensure that all items listed in the contract, like kitchen appliances or light fixtures, are still in place and in good working order.
Tip: Make a list of all contract items to check off during the walkthrough. This will help ensure nothing is overlooked.
Final Inspection
The final inspection is your last chance to address any issues before closing. While it’s generally not an opportunity to back out of the purchase, it’s essential for ensuring everything is as expected.
- Document Issues: If you find any problems, document them with photos and notes. Communicate these issues to your real estate agent immediately.
- Negotiate Solutions: Minor issues can often be resolved by negotiating with the seller for repairs or credits at closing. However, significant problems may require more substantial solutions.
Example: If you find a leaky faucet during the walkthrough, ask the seller to fix it before closing or provide a credit to cover the repair costs.
Quote: “The purpose of the walkthrough is to confirm that the home is in the same condition that it was on the day of the inspection,” says Katie Severance.
The final walkthrough is a vital step to ensure your new home meets all expectations and contractual obligations. Once this step is complete, you’re ready to move on to the final stage: closing the deal.
5. Closing
Closing is the final step in the escrow account process. This is where all the hard work pays off, and you officially become the homeowner. Here’s what you need to know about this crucial stage:
Closing Disclosure
At least three business days before closing, you’ll receive a closing disclosure from your lender. This five-page document details all the critical aspects of your mortgage loan, including:
- Purchase Price: The total amount you’re paying for the property.
- Loan Fees: Any fees associated with obtaining your mortgage.
- Interest Rate: The rate at which interest will accrue on your loan.
- Real Estate Taxes: Estimated property taxes for the upcoming year.
- Closing Costs: All the costs associated with closing, including escrow fees.
Tip: Compare the closing disclosure to the loan estimate you received when you applied for the loan. Make sure there are no unexpected fees or discrepancies.
Local Records Office
Once all documents are signed, the escrow agent will prepare a deed naming you as the new property owner. This deed is then filed with the local records office. Filing the deed is a crucial step as it makes your ownership official and public.
Cashier’s Check
To cover the remaining down payment and closing costs, you’ll need a cashier’s check or arrange a wire transfer. This ensures that all funds are available and can be disbursed appropriately.
Steps:
- Obtain Cashier’s Check: Contact your bank to get a cashier’s check for the exact amount needed.
- Wire Transfer: Alternatively, arrange for a wire transfer to the escrow account.
Note: Personal checks are typically not accepted for closing costs due to the need for guaranteed funds.
Funds Disbursement
After all documents are signed and funds are secured, the escrow agent will disburse the funds. This includes:
- Seller Payment: The seller receives the proceeds from the sale.
- Lender Payment: Any outstanding loan balances or liens are paid off.
- Service Fees: Payments to real estate agents, title companies, and other service providers.
Example: The escrow agent wires the funds to the seller’s account and pays off the seller’s mortgage, ensuring all financial obligations are met.
Quote: “The closing process varies somewhat by state, but basically, you’ll need to sign a ton of paperwork,” notes Investopedia.
By understanding these key steps, you can steer the closing process with confidence. Once everything is finalized, you’ll receive the keys to your new home and can officially move in.
Escrow Accounts for Homeowners
After you purchase your home, your mortgage lender will set up a different kind of escrow account. This account helps manage your property taxes, homeowners insurance, and mortgage insurance (if required). Here’s how it works:
Monthly Mortgage Payment
Your monthly mortgage payment is more than just principal and interest. It also includes a portion for property taxes and insurance premiums. This extra amount goes into your escrow account.
Property Taxes
Your lender will estimate your annual property taxes and divide that amount by 12. This monthly portion is added to your mortgage payment and deposited into your escrow account. When your property tax bill is due, your lender will pay it from this account.
Insurance Premiums
Homeowners insurance premiums work the same way. Your lender estimates the annual cost and divides it into monthly payments. These payments are also added to your mortgage payment and deposited into your escrow account. When your insurance bill is due, your lender pays it from this account.
Escrow Cushion
Lenders usually require a small cushion in your escrow account to cover any unexpected increases in property taxes or insurance premiums. This cushion is typically equal to two months of payments. It ensures there’s always enough money in the account to cover your bills.
Annual Statement
Each year, your lender will send you an annual escrow account statement. This statement includes:
- Insurance and Property Tax Costs: Details of the costs paid from your escrow account.
- Shortage or Surplus: Information on whether you have a shortage or surplus in your account.
- Payment Adjustments: Any changes to your monthly escrow payments for the coming year.
Example: If your property taxes increase, your lender will adjust your monthly payments to cover the higher amount. If there’s a surplus, you might get a refund or see a reduction in your monthly payment.
Fact: Some states require lenders to pay interest on the money held in escrow accounts, but this isn’t common everywhere.
By understanding how your escrow account works, you can better manage your finances and ensure your property taxes and insurance premiums are paid on time.
Frequently Asked Questions about the Escrow Account Process
How does an escrow account work?
An escrow account is a special account set up by your mortgage servicer to manage your property taxes and insurance premiums. Each month, a portion of your mortgage payment goes into this account. Here’s a breakdown:
- Monthly Payment: Your mortgage payment includes principal, interest, and an extra amount for taxes and insurance.
- Principal and Interest: This part goes towards paying down your loan and the interest on it.
- Taxes and Insurance: This part is deposited into your escrow account. When your tax and insurance bills are due, your lender pays them from this account.
What is the escrow deposit process?
When you first buy a home, you’ll need to make an initial deposit into an escrow account. Here’s how it works:
- Initial Deposit: Also called earnest money, this deposit shows you’re serious about buying the house. It’s usually due within a few days of signing the purchase agreement.
- Escrow Account: The deposit goes into an escrow account managed by a neutral third party, such as an escrow agent or title company.
- Down Payment and Closing Costs: The earnest money eventually becomes part of your down payment or covers some of your closing costs.
Example: If you agreed to a $10,000 earnest money deposit, it will be held in the escrow account until the sale is finalized. If the deal goes through, it’s applied to your down payment. If not, the conditions of the sale will determine who gets the money.
Who owns the money in an escrow account?
The money in an escrow account is technically owned by the buyer, but it’s managed by the escrow agent or mortgage servicer. Here’s what you need to know:
- Buyer Ownership: The funds in the escrow account are still yours until they are used to pay taxes and insurance.
- Escrow Agent: This neutral third party holds the money and ensures it’s used according to the terms of the transaction.
- Transaction Obligations: The escrow agent or mortgage servicer is responsible for making sure the funds are disbursed correctly, whether it’s for property taxes, homeowners insurance, or other agreed-upon expenses.
Fact: Some states require lenders to pay interest on the money held in escrow accounts, but this varies by location.
By understanding these key aspects of the escrow account process, you can steer your home purchase more confidently and ensure your financial obligations are met smoothly.